how to organize cables behind desk neatly starts with one honest goal: make your setup easy to live with, not just pretty for a photo.
If you have a “cable nest” behind the desk, you already know the pain, you bump one cord and everything shifts, dusting turns into a project, and when something stops working you end up unplugging the wrong thing.
This guide gives you a practical path: a quick audit, the right tools (without buying a whole kit), and a few layout rules that keep cables clean long-term, even if you move your desk or swap devices.
Why cables get messy behind desks (and why it keeps coming back)
Most cable mess comes from a few predictable habits, not “being bad at organizing.” Once you see the pattern, the fix gets simpler.
- Too many power bricks in one spot, so cords stack, twist, and pull each other out of place.
- No anchor points, cables hang by gravity, then get snagged by feet, chairs, or vacuum cleaners.
- Mixing power and data, HDMI, USB, Ethernet, and power cords end up braided together, making swaps annoying.
- Zero slack plan, cords are either stretched tight (risking strain) or left long (creating loops and tangles).
- New gear “temporary” additions, a phone charger here, a webcam there, and suddenly the tidy system fails.
According to OSHA (Occupational Safety and Health Administration), good housekeeping helps reduce hazards like trips and electrical risks in workplaces. You don’t need to turn your home office into a job site, but it’s a useful reminder: messy cables are not only ugly, they can become a safety and reliability issue.
A quick self-check: what kind of cable problem do you have?
Before you buy accessories, figure out what’s actually causing the mess. Pick the statements that feel true, you may have more than one.
- “I can’t vacuum under my desk without unplugging stuff.” You need lifting and routing, usually a tray plus anchors.
- “I don’t know which cable is which.” You need labeling and separation, not more ties.
- “Cables look neat, but things disconnect when I raise/lower the desk or move it.” You need slack management and strain relief.
- “My power strip sits on the floor and collects dust.” You need the power strip off the floor and power bricks corralled.
- “I add/remove devices a lot.” You need a modular approach: channels, Velcro, and easy-access junction points.
Once you know your category, how to organize cables behind desk neatly becomes less about perfection and more about the right structure.
Tools that matter (and what you can skip)
You can do this with a small set of basics. The trick is choosing items that stay flexible when your setup changes.
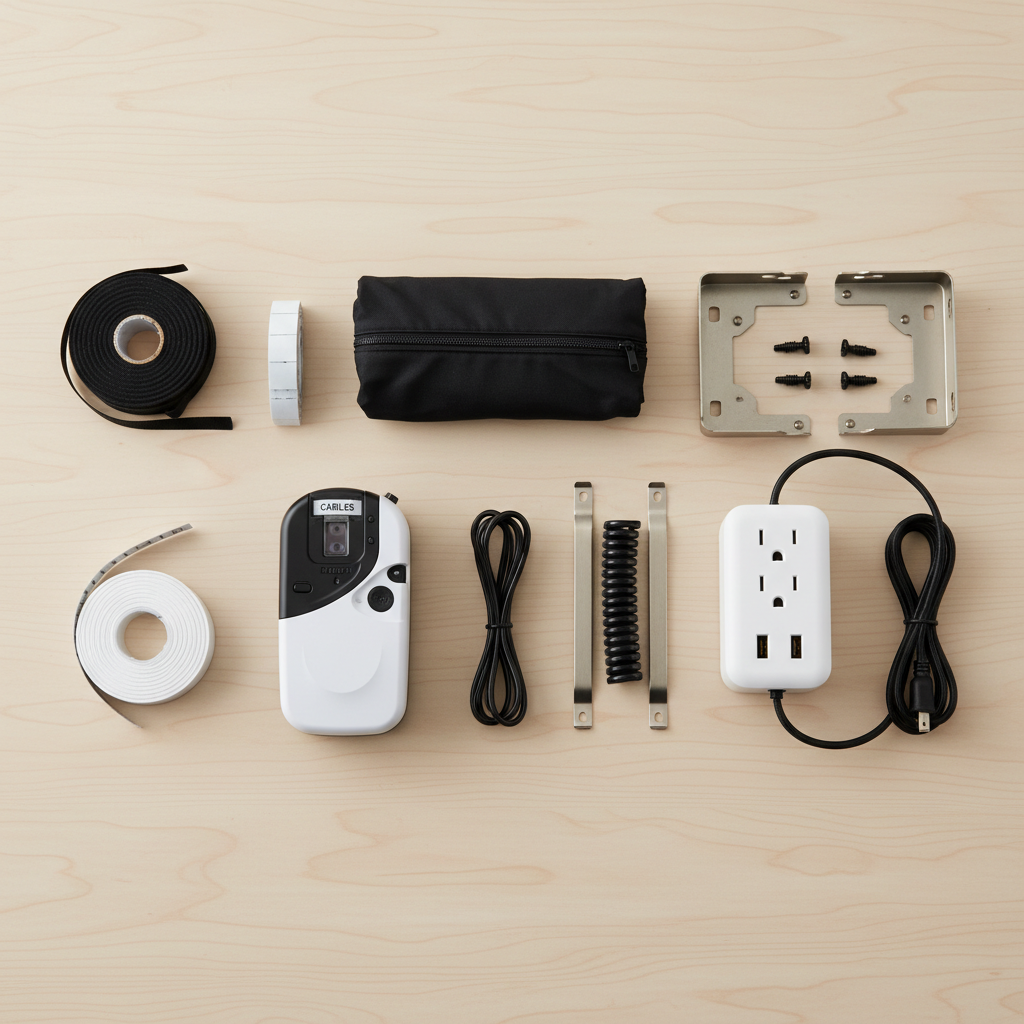
Recommended basics
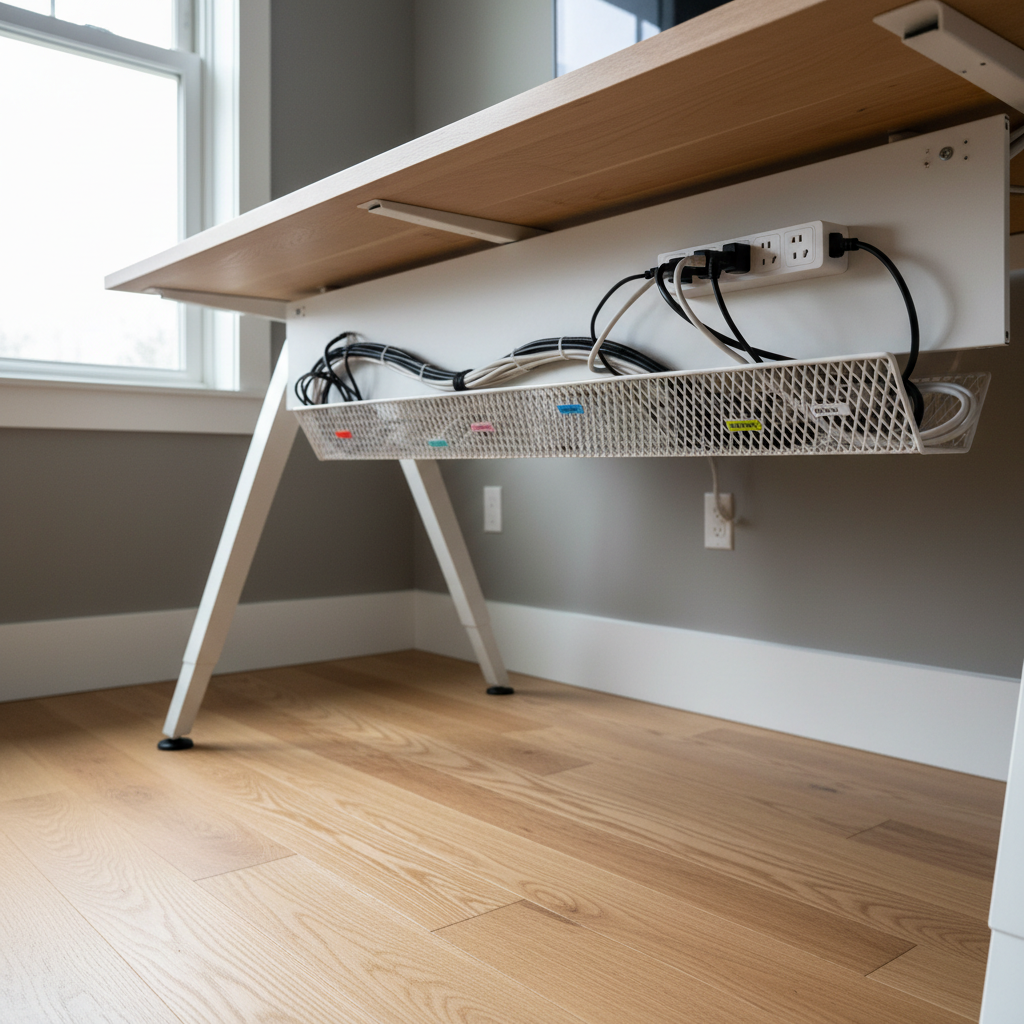
- Under-desk cable tray (basket or metal tray): catches everything and hides it from view.
- Velcro cable ties: reusable, better than zip ties for desks you change often.
- Adhesive cable clips: create anchor points along desk legs and edges.
- Label tape or wrap labels: fast troubleshooting later.
- A short extension cord (if needed): prevents tight runs to the wall outlet.
Nice-to-have, depending on your desk
- Cable sleeve: good when you want one clean bundle going down a leg.
- J-channel or raceway: best for straight lines along the back underside of the desk.
- Surge protector with mounting slots: easier to mount under the desk than a basic power strip.
Usually skippable (or use carefully)
- Permanent zip ties everywhere: clean look, terrible for future changes unless you leave scissors nearby.
- Overstuffed cable boxes: they hide clutter but can trap heat; if you use one, keep it roomy and ventilated.
Step-by-step: a tidy setup that stays tidy
This is the workflow that tends to hold up in real life. Set aside 30–60 minutes, more if you have lots of devices.
1) Unplug intentionally, then do a fast cable audit
Turn devices off, then unplug one “group” at a time (monitor area, PC area, chargers). As you unplug, decide what stays and what goes. Dead chargers and mystery USB cables are usually half the mess.
- Keep: cables you use weekly, plus one spare charger you actually trust.
- Remove: duplicates, low-quality cables, and anything you can’t identify after a quick check.
2) Move power off the floor
Mount the surge protector under the desk (or place it in a tray). This single move often makes the biggest visual difference and helps with cleaning.
- Place it where you can still reach the switch if you use it.
- Leave a little air around power bricks; crowded bricks can run warm.
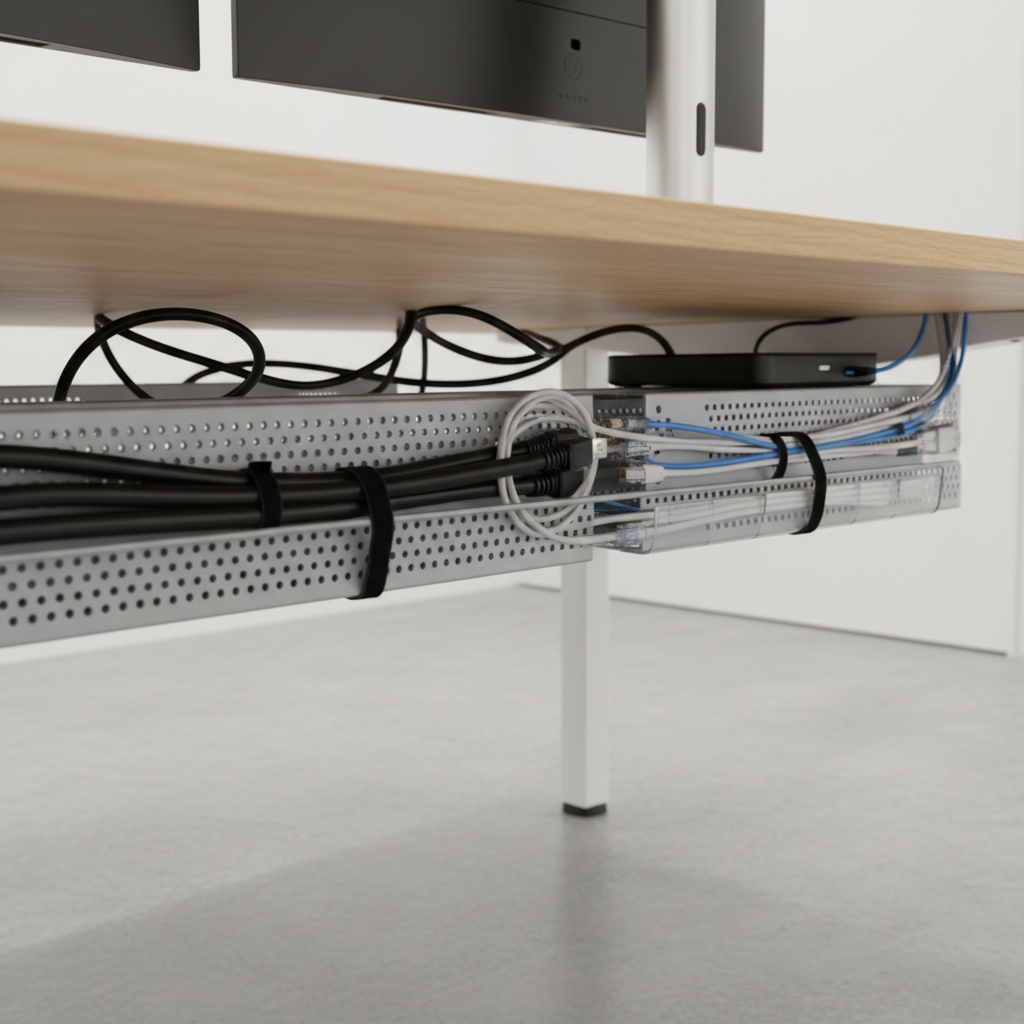
3) Create two routes: “power highway” and “data highway”
Run power cables to one side of the desk underside and data cables to the other when possible. It’s not always required, but it reduces tangling and makes troubleshooting calmer.
- Power: wall power, power strip leads, device power bricks.
- Data: HDMI/DisplayPort, USB, Ethernet, audio cables.
4) Add anchor points and strain relief
Use adhesive clips along the back edge and down a desk leg. The goal is to stop cables from hanging freely and to prevent connectors from taking the weight.
- Leave a gentle loop near ports so plugs aren’t pulled tight.
- If you have a sit-stand desk, leave extra slack and guide it down a leg, not straight down the middle.
5) Bundle only where it helps
Bundle cables into small groups based on function, not one giant snake. Velcro ties every 6–10 inches usually looks clean without making future changes miserable.
- Bundle monitor cables together.
- Bundle desktop peripherals together.
- Keep a separate bundle for chargers you swap often.
6) Label the “ends that matter”
Labeling sounds picky until you need to find the right cable in 10 seconds. Label both ends for anything that looks similar.
- Examples: “Monitor 1 DP,” “Dock USB-C,” “Speakers,” “Router.”
If you do these steps in order, how to organize cables behind desk neatly stops being a one-time cleanup and turns into a system.
A simple layout plan (with a quick reference table)
When people get stuck, it’s usually because they try to hide everything without deciding where “everything” should live. Use this as a default map.
| Zone | What belongs there | Best organizers | Common mistake |
|---|---|---|---|
| Under-desk center/back | Power strip, power bricks | Cable tray, mounted surge protector | Leaving the strip on the floor |
| Back edge underside | Long horizontal runs | J-channel, raceway, clips | Letting cables droop into leg space |
| Desk leg | Vertical drop to floor/outlet | Cable sleeve, clips | One tight bundle with no slack |
| On-desk “access zone” | Phone charger, headset cable | Small clips, magnetic cable holder | Trying to hide cables you use daily |
Common mistakes that make cable management look worse
These show up a lot, even in setups that look tidy at first glance.
- Over-tightening bundles, especially near ports, can strain connectors over time.
- Mixing every cable into one sleeve, then having to open it anytime you add a device.
- Ignoring heat around power adapters; if something feels hot to the touch, give it space and consider a different placement.
- Sticking adhesive clips to dusty surfaces; they fall off later, then the whole system collapses.
- Not planning for cleaning; if you can’t access outlets or remove dust, the mess returns fast.
When to get extra help (or at least slow down)
Most desk setups are safe and simple, but a few situations deserve more caution.
- You see damaged insulation (cuts, exposed wire): stop using that cable and replace it.
- Outlets feel loose, spark, or smell hot: it’s smart to stop and contact a licensed electrician.
- You’re running many high-draw devices (space heater, large printer, multiple monitors): you may need to rethink what shares a circuit, an electrician can advise.
- Standing desks with frequent movement: plan for motion, if the desk pulls on a cord, redesign the slack and routing.
According to NFPA (National Fire Protection Association), electrical safety starts with using equipment properly and avoiding damaged cords. If anything about your wiring seems questionable, getting professional input is usually the safer call.
Key takeaways and a quick action plan
Key takeaways: Put power off the floor, separate power from data where you can, anchor cables so they don’t hang, and label the ends you’ll need later.
- Today (15 minutes): remove unused cables, mount or lift the power strip.
- This week (30 minutes): add a tray or raceway, route two clean paths, create slack loops.
- Ongoing (2 minutes): when you add a device, label it and tie it into the system right away.
If you want your desk to feel calmer every day, pick one improvement that removes friction immediately, most people feel it the moment the floor clears and cables stop snagging.
FAQ
- How do I organize cables behind desk neatly if I rent and can’t drill?
Use adhesive raceways, adhesive clips, and a cable tray that clamps on. Clean surfaces with isopropyl alcohol first so adhesives hold better. - What’s the easiest first step if I only have 10 minutes?
Get the power strip off the floor and Velcro-tie the longest slack. That alone reduces tangles and makes cleaning easier. - Should I use zip ties or Velcro for desk cable management?
Velcro usually wins for desks because it’s reusable. Zip ties can look cleaner, but they’re less forgiving when you swap devices. - How do I hide power bricks and adapters without overheating?
Give adapters breathing room in a tray or basket and avoid tightly packed boxes. If an adapter runs hot, spread items out and consider a different power supply. - How can I keep cables neat on a standing desk?
Plan for movement: route cables down one leg, leave extra slack, and use strain relief near ports. Test a full up-and-down cycle before final tying. - Why do my adhesive clips keep falling off?
It’s usually surface prep or placement. Wipe the surface clean, let it dry, press firmly, and avoid textured/paint-chalky areas when possible. - Do I need to separate power and data cables?
Not always, but it helps reduce tangling and makes troubleshooting simpler. If your setup is dense, even partial separation can make a noticeable difference.
If you’re trying to tidy a busy work-from-home setup and want a more “set it and forget it” result, it can help to start with a cable tray and a simple labeling plan, then build around that instead of chasing a perfect-looking bundle.